Carrot Muffins with Coconut Whip (Dairy-Free)
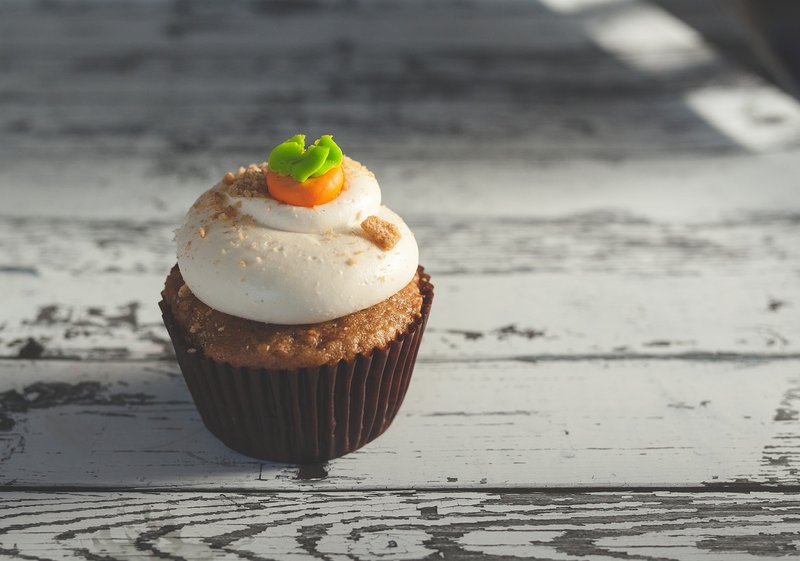
carrot muffins with coconut whip
carrot muffins with coconut whip
Ingredients
- 8 oz carrots, peeled and chopped
- one egg
- one-third cup sugar
- one-fourth cup applesauce
- half teaspoon vanilla extract
- one-fourth cup coconut oil
- half cup gluten-free all-purpose blend (or regular all-purpose flour)
- half cup whole spelt flour (or oat or whole wheat flour)
- one teaspoon baking powder
- half teaspoon baking soda
- two teaspoons cinnamon
- half teaspoon salt
- one can full-fat coconut milk (chilled overnight)
- several tablespoons maple syrup or sifted powdered sugar
Instructions
Step 1
Set your oven to 350°F and let it fully preheat before the batter goes in—this steady heat helps the muffins rise tall and even from the very first minute. While it warms up, generously grease a standard 12-cup muffin tin with butter or neutral oil, making sure to coat the sides and bottoms thoroughly so your muffins pop out cleanly once they're baked.
Step 2
Toss your peeled carrots into the food processor and pulse 4-5 times until they resemble coarse grated cheese—stop before they turn to mush, since you want texture in the muffins, not purée. Crack in the egg, then add the sugar, applesauce, vanilla, and coconut oil, blending for about 30 seconds until the mixture turns a uniform pale orange and looks completely smooth. The applesauce helps bind the oil into the batter, so you won't see any greasy streaks.
Step 3
Grab a medium bowl and sift in your flours, baking powder, baking soda, cinnamon, and salt. Whisk everything together until the mixture looks uniform and no lumps remain, since sifting aerates the flour and ensures the leavening agents are evenly distributed. This extra minute prevents those bitter pockets of baking soda that can form in your finished muffins.
Step 4
Pour your wet mixture into the well in the dry ingredients. Using a rubber spatula or wooden spoon, fold the batter gently from the outside edges toward the center, turning the bowl as you go. Stop as soon as the flour streaks disappear and you're left with a thick, slightly lumpy batter—overmixing develops gluten and gives you tough, dense muffins instead of tender ones.
Step 5
Use a large spoon or ice cream scoop to portion the batter into your greased muffin tin, filling each cup about two-thirds full—that's roughly 1/3 cup per muffin. Don't overfill them; the batter needs room to rise and create those lovely domed tops without spilling over the sides. If you have a standard 12-cup tin, this should give you exactly one dozen muffins with no leftover batter to worry about.
Step 6
Slide the tin onto the center rack and bake at 350°F for 15 to 18 minutes, until the tops are deeply golden and spring back when you press them gently. Starting at the 15-minute mark, poke a toothpick into the center of a muffin—it should come out clean or with just a few moist crumbs clinging to it. Watch closely during those last few minutes, because these muffins can shift from tender to dry very quickly, so pull them out the second they pass the test.
Step 7
Slide the muffins onto a wire rack and give them about 30 minutes to cool down, or until they feel room temperature when you touch the tops. Warm muffins will turn your coconut whip into a melted puddle, so patience here really pays off. They're ready when they spring back gently under your fingertips and no warmth rises from the centers.
Step 8
Chill the can of coconut milk in the fridge overnight so the cream separates naturally from the watery liquid—this keeps you from having to shake it and remix everything. Once it's cold and undisturbed, open the can gently and scoop out just the thick, solid white cream that's risen to the top, leaving the thinner coconut water below for smoothies or curry. Transfer that rich cream to a chilled bowl and whip it with a whisk or electric mixer for about 2–3 minutes until it becomes light and fluffy like soft frosting. Sweeten it with a tablespoon of maple syrup or a dusting of powdered sugar, tasting as you go, then spoon a generous dollop onto each cooled muffin and finish with a light dusting of cinnamon.
My Tip
Pulse the carrots just until they're grated, not puréed—you want those little orange flecks for texture, because over-processing turns them into a wet mush that weighs down the muffins.
Leftovers
Store the cooled muffins in an airtight container at room temperature for up to two days, since the coconut whip holds its shape best when it isn't refrigerated. If your kitchen runs warm or you want to keep them longer, refrigerate for up to five days, but let them sit out for ten minutes before serving so the flavors aren't muted by the chill. For longer storage, freeze the muffins without the whip and add the coconut topping fresh after thawing.
Make It Your Own
If you want to add some crunch, fold in half a cup of toasted walnuts or pecans right before baking—toasting them first in a dry skillet for two minutes wakes up their oils so they stay crisp in the moist crumb instead of turning soft. You can also swap the all-purpose flour for whole wheat pastry flour; it keeps the muffins tender because it has less protein than standard whole wheat, while adding a subtle nuttiness that pairs beautifully with the cinnamon and ginger.